Free shipping on orders of $35 or more
0 Cart
Added to Cart
    You have items in your cart
    You have 1 item in your cart
    Total
    Check Out Continue Shopping

    Articles and Recipes — gluten Free

    Strawberry Rhubarb Crumble

    Strawberry Rhubarb Crumble

    It’s rhubarb season, which lasts from April to July in most places. The warmer the climate the shorter the season.

    My memories of rhubarb go back to spring and my teenage years when I picked rhubarb from the back garden, where I recall it growing all summer long. Rhubarb pie is one of the first pies I learned to bake and was my dad’s favorite. 

    Fast forward to heart-healthy eating and fewer people at home to eat a pie and I need my rhubarb fix in a different way.  I was really pleased to find this recipe for Strawberry Rhubarb Crisp from  Once Upon a Chef.  I decided to try her recipe because of the simplicity of the ingredients and the added pecans and oats in the topping. 

    I was also very excited that this was a quick recipe to assemble and would be easy to transport to a picnic or beautifully elegant to serve at a dinner party. 

    I did make two changes - first I substituted gluten-free Namaste Perfect Flour Blend and second Miyoko’s European-style vegan butter. This recipe calls for a 2-quart baking dish, I used my 9.5 inch Pyrex pie dish which worked fantastically.

    The two-part method is easy. First, wash and cut your fruit. Then mix the fruit well with granulated sugar, cornstarch, and vanilla in a large bowl. Transfer this to the baking dish. 

    Second, create the topping by combining flour, brown sugar, granulated sugar, salt, and cold butter in a medium bowl using a pastry cutter. Then stir in the oats and chopped pecans. Spoon this mixture over the fruit. 

    The crumble smelled delicious as it baked and the topping came out crispy and browned with lovely bubbly fruit beneath.  We ate it simply as it was. Adding whipped cream or ice cream would have been heavenly! 

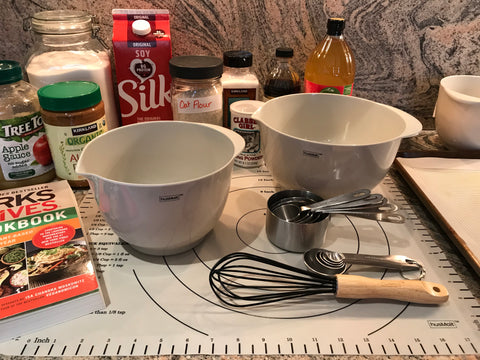
    Equipment used: Our Bowl Sets are currently on SALE June 2021

    Measuring spoons
    Measuring cups
    Bowls - Set of 3 Melamine Bowls or Set of 3 Stainless Steel Bowls
    7” Santoku knife
    Wire Cooling Rack
    Cutting Board
    Pastry Cutter


    Luscious Flourless Orange Cake

    Luscious Flourless Orange Cake


    Here in the husMait kitchen, we look for a great treat that will satisfy our sweet tooth and have some redeeming qualities. We found this recipe posted over on Instagram, and it looks so moist and delicious, not to mention the recipe had simple ingredients and was easy to follow. Baking Envy, Flourless Orange Cake 

    Assemble all of your utensils: knife, cutting board, pan, measuring cups, measuring spoons, mixing bowl, blender and 8 inch round cake tin.

    Assemble all of the ingredients: oranges, sugar, almond meal, eggs, vanilla essence, and baking powder.  Then follow the recipe linked above. 

    The recipe calls for whole oranges, which are boiled and then processed in a blender, unfortunately, the oranges I used were a bit pithy and left a slightly bitter flavor in the cake. For that reason, I would take the time to peel the zest and cut the pith away from the fruit before boiling it. Another slight change I made was to cook the remaining orange/sugar water down until it was beginning to be jammy. That made a wonderful glaze that remained on the top of the cake instead of disappearing into the cake.  

    Everyone here loved this cake's excellent taste and texture. The use of the almond meal was sheer brilliance as it adds a luscious texture and flavor to the cake. To add a professional finish to this cake I would add some candied orange tweels to the top.

    This would be a lovely cake for an afternoon tea or formal dinner dessert as you can bake it up to three days in advance, storing it in the refrigerator, or frozen for six months remembering to leave the glaze off until you are ready to serve it. 

    If you bake this cake let us know how it turns out, and go give Chloe, over at Baking Envy a review as well. 

    With warm wishes for your home, 
    from the husMait home kitchen.


    Pickled Beets - Spring Time

    Pickled Beets - Spring Time

    It must be spring, the weather is warming up, and the sun is shining. My thoughts turn to barbecue, picnics, and drinks on the patio. Today I made my first batch of refrigerator pickled beets of the season.

    This recipe is so simple. I wanted to share my shortcut and my measurements so that you get a perfectly filled one-quart Mason Jar. 

    The biggest shortcut is to use Love Beets ready to eat Organic Cooked Beets. You will need two of the 300-gram packs. I open them over the sink and place them in a colander to drain while preparing the rest of the ingredients. 

      1-quart size Mason or other glass jar
      1 pound small cooked beets; sliced
      1/2 red or white medium onion; sliced thin
      1 1/8 cup white vinegar
      1/3 cup sugar
      1 1/2 teaspoon salt
      3/4 teaspoon peppercorns
      4 cloves
      1-2 bay leaves

      1. In a large heat-resistant bowl combine sliced beets, onion, salt, peppercorns, cloves, and bay leaves. 
      2. Combine vinegar and sugar in a small saucepan, simmer until the sugar is completely dissolved about 5 minutes.
      3. Remove from heat and pour over the vegetables stir.
      4. Let cool, remove the bay leaves, and spoon into the jar.
      5. Refrigerate - these are ready to eat in just a few hours and mellow as they age. 
      This recipe also makes a beautiful presentation jar to present as a picnic hostess gift:
      Layer the sliced beets, sliced onions, and seasonings, except the bay leaves. Add the bay leaves to the boiling vinegar/sugar, let the liquid cool for 5 minutes. Discard the bay leaves then pour the vinegar mixture into the jar, jiggle the jar to release any air pockets. 

      With warm wishes for your home, 
      from the husMait home kitchen.
      Products used: 
      Stainless Steel Colander is part of the 11 Piece Bakeware Set

      Gluten Free Gingerbread

      Gluten Free Gingerbread

      A family favorite traditional Gingerbread cookie recipe that I have been baking for close to 40 years, and have substituted gluten-free flour, plant-based milk, and plant-based butter. 

      We loved the crisp texture and ginger flavor these cookies delivered!

      Read more

      Banana Muffins - Gluten-free, Dairy Free

      Banana Muffins - Gluten-free, Dairy Free

      Many of us change our diet and meal planning in response to health issues, be that an allergy, heart disease, diabetes, or perhaps a lifestyle choice for environmental or cultural reasons. When we do so we do not need to completely leave our family favorite comfort food behind.  

      Read more

      Tea Biscuits

      In the husMait kitchen we baked the Forks Over Knives, The Cookbook, Tea Scones; and they are delicious! Although not traditional scones, the batter is scooped, not rolled and cut.

      It was so useful to have the Set of Three Melamine Mixing Bowls while following this recipe which required separate bowls for the dry ingredients, the liquids, and to blend almond butter and apple sauce. The bowls pair perfectly with our Silicone Flour Scraper. 

      Using a water spray bottle was a fantastic piece of advice in the FOK recipe to spray water into the cup between scoops so that the batter came out easier. We used the husMait 1/4 cup Stainless Steel Measuring cup for the perfect scoop.


      We experimented baking on both the 10 x 14 Non-Stick Baking Sheet, and the Silicone Baking Mat. The scones released cleanly and easily from both, while the baking sheet gave the scones a crisper bottom. The Baking Sheet and Silicon Mat are available individually or in the Essential Bakeware 5 Piece Set

      Served with a little jam, these are perfect with a cup of tea.

      Come over to our Instagram for a video tutorial! 

      With warm wishes for your home,
      From the husMait home kitchen.